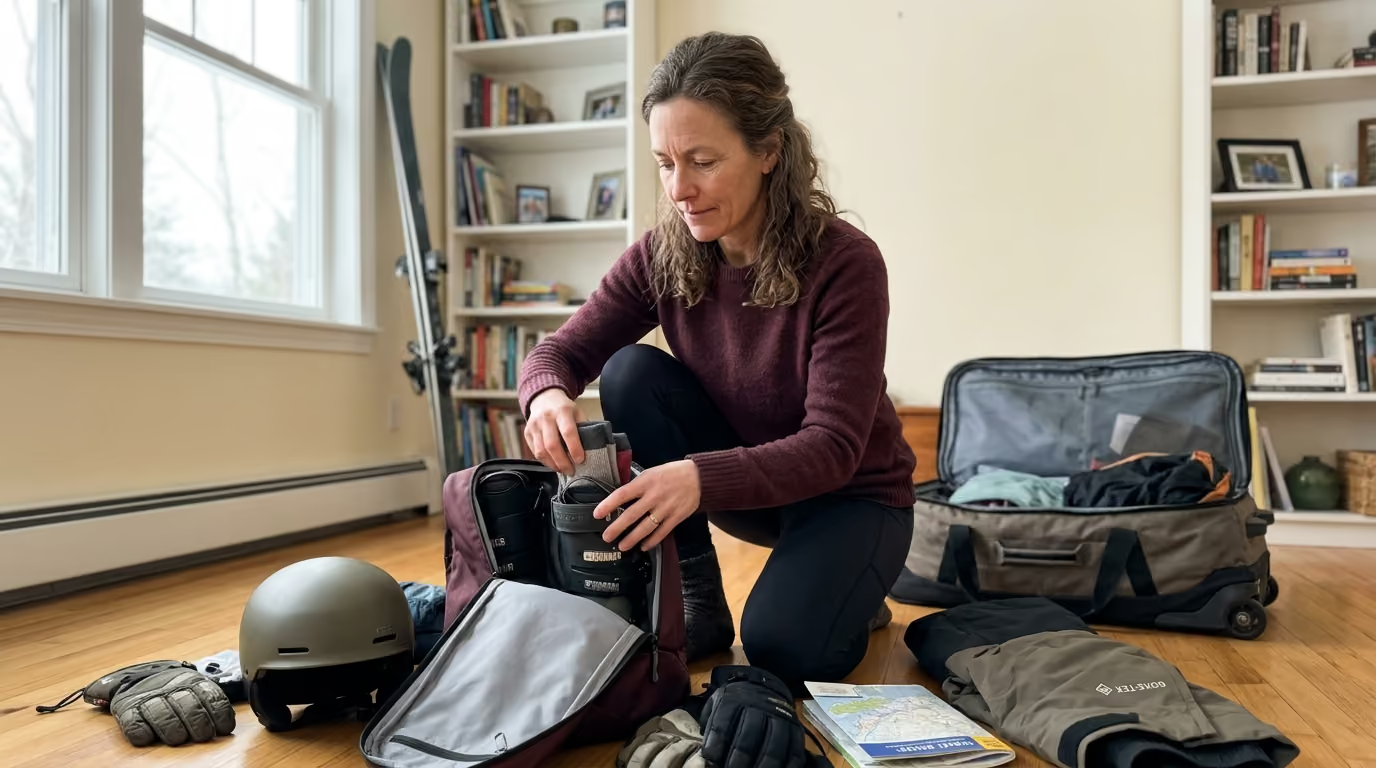

Ski trip preparation after forty requires targeted eccentric strength training, smart joint protection, and structured recovery strategies to prevent fatigue and injuries on the mountain.





Many skiers over forty search online for ways to avoid knee pain, prevent severe fatigue, or survive a multi-day mountain trip without injury. The common advice usually consists of generic wall sits and vague reminders to hydrate. This guide provides a definitive physical preparation and mountain management framework designed specifically for the physiological realities of skiing and snowboarding in your forties, fifties, and beyond.
Planning a winter sports holiday after forty requires a distinct mindset. You are managing a multi-day athletic event that combines intense eccentric loading, cold temperatures, reduced oxygen, and shifting snow conditions. With the right conditioning, equipment fit, and pacing strategies, you can ski with power and control while feeling completely refreshed each morning.
A successful ski trip after forty is an integrated physical project rather than a casual holiday. The primary challenge on the mountain is not producing single bursts of maximum force. The real demand is maintaining repeated motor control under heavy eccentric loads while processing environmental stressors like altitude, cold, and accumulated physical fatigue.
Age alone does not make alpine sports dangerous. Research on aging skiers shows that participants over fifty-five actually experience lower injury rates across multiple categories compared to younger recreational skiers. However, when high-impact trauma does occur in mature skiers, the clinical consequences can be more severe. This means your preparation must focus on preserving joint integrity, building muscular endurance, and making calculated decisions on the slopes.
Readiness can be understood through a simple operational equation:
Trip Readiness = Physical Capacity × Technical Skill × Recovery Capacity × Environmental Preparation × Risk Management
If any single element in this equation is compromised, you must adjust your skiing volume, speed, or terrain. Relying solely on willpower when physical capacity or recovery is low is the most common reason ski trips end early. Building a robust physical reserve allows you to ski challenging terrain with confidence while protecting your joints. For deeper insights on managing active journeys, review our travel and adventure planning resources.
Skiing places unique mechanical demands on the musculoskeletal system that standard gym routines rarely replicate. When you initiate a turn, your downhill leg absorbs forces that can reach several times your body weight. This force does not occur while your muscles are shortening. Instead, your quadriceps, gluteal complex, and calves must lengthen under high tension to decelerate your center of mass and maintain balance against changing snow resistance.
This form of muscle action is known as eccentric contraction. Research identifies eccentric muscular fatigue in the quadriceps and hamstrings as a major contributor to technical breakdown and injury risk. Without specific eccentric conditioning, the repetitive shock absorption of hundreds of turns creates micro-trauma in muscle fibers. This leads to delayed onset muscle soreness, slower reaction times, and compromised joint stability by the afternoon of your second day.
Isometric strength is equally critical. Throughout every descent, you maintain a continuous, athletic flexed posture. Your core, hip stabilizers, and lower legs work isometrically to transfer pressure from your body directly through the boot cuffs and into the ski edges. If your isometric endurance fails, your hips drop backward, your center of mass falls behind your feet, and your quadriceps burn out rapidly. This "backseat" posture places extreme mechanical strain on the anterior cruciate ligament and reduces your ability to steer the skis.
Proprioception and sensorimotor control represent the neurological foundation of alpine performance. Proprioception is the internal sense of joint position in space, while sensorimotor control is your nervous system's ability to process sensory information and execute instant postural corrections. On the snow, your visual system, inner ear, and joint receptors must constantly coordinate across changing light and uneven surfaces.
After forty, natural reductions in sensory feedback and motor unit firing rates can subtly delay these balance corrections. When skis hit an unexpected patch of ice or heavy spring slush, an untrained nervous system reacts fractions of a second too slowly. Building single-leg stability and reactive balance before your trip sharpens these neural pathways, allowing your body to make automatic micro-adjustments before a minor slip turns into a fall.
Epidemiological research provides important context for mature skiers. Studies show that older skiers experience higher relative risks for specific injuries, notably tibial plateau fractures, which occur at higher rates in skiers over fifty-five than in the general skiing population. Furthermore, data from trauma registries indicate that older recreational athletes who sustain high-energy impacts face higher rates of complex fractures and hospital admissions.
These findings do not suggest that mature adults should abandon the sport. Instead, they highlight why baseline tissue capacity, knee stability, and sensible speed management are vital. By developing strength across multiple contraction types, you build structural resilience that protects your joints against twisting forces and abrupt impacts. Explore our dedicated strength and physical performance guides to structure your foundational gym work.
Preparing your body for alpine skiing requires a structured timeline. Starting eight to twelve weeks before your departure gives tendons, ligaments, and muscle tissues sufficient time to adapt to progressive loading without causing overuse injuries. A compressed, last-minute workout plan often produces excessive fatigue right before travel begins.
The initial four weeks establish fundamental joint control, core stability, and baseline aerobic endurance. Your primary goal is creating tissue capacity that can handle more intense, ski-specific training in later weeks.
Perform two strength sessions and three aerobic sessions weekly. Your strength work should prioritize fundamental human movement patterns: the squat, the hinge, the unilateral split stance, and rotational core stability.
The middle phase shifts focus toward eccentric deceleration and lateral stability. You will slow down the lowering phase of your exercises to simulate the shock-absorbing demands of descending a mountain.
During this phase, introduce controlled tempo work into your strength sessions. Spend three to four seconds lowering into squats, split squats, and step-downs. Add lateral bounds with brief pauses on the landing leg to train your nervous system to absorb lateral forces without knee collapse.
The final intense training block prepares your body for consecutive days on snow. You will simulate the alternating demands of physical exertion and brief rest periods.
Incorporate high-intensity cardiovascular intervals alongside your strength sessions. Use a stationary bicycle, rowing machine, or stair climber for thirty to ninety seconds of high-output work, followed by two minutes of active recovery. Schedule two moderate training sessions on back-to-back days once per week to test your recovery capacity and teach your body to perform with residual fatigue.
The final seven days before your trip are for active recovery, not cramming fitness. Attempting heavy, novel workouts during this week will only create lingering muscular soreness and deplete your energy reserves.
Cut your overall training volume by fifty percent while maintaining movement quality. Focus on light aerobic flush sessions, joint mobility routines, and restful sleep. Your goal is to arrive at the resort feeling completely fresh, supple, and physically prepared.
Stand on a sturdy box or low platform roughly six to eight inches high. Balance on your right foot while hovering your left foot off the side.
Slowly bend your right knee and push your hips slightly backward, taking three full seconds to lower your left heel toward the floor. Barely touch the floor with your heel without shifting weight onto it, then drive through your right foot to return to the top. Keep your standing knee tracking directly over your second toe throughout the repetition. Complete three sets of eight to ten repetitions per side.
Place the top of your rear foot on a bench behind you and step your front foot forward into a lunge stance. Keep your torso tall with a slight forward athletic lean from the hips.
Lower your back knee toward the floor over a three-second count until your front thigh is parallel to the ground. Ensure your front knee remains stable and does not cave inward. Press through your front midfoot and heel to return to the starting position. Perform three sets of six to eight controlled repetitions per leg.
Stand on your left leg with a slight, soft bend in the knee. Keep your spine straight and your shoulders level.
Hinge forward at the hips while extending your right leg straight behind you like a counterbalance. Lower your torso until it is roughly parallel to the ground, feeling tension build along your left hamstring and glute. Return to the starting position by contracting your glute and bringing your hips forward. Complete three sets of eight repetitions on each side.
Lean your back flat against a smooth wall and slide down until your thighs are parallel to the floor, with your knees bent at ninety degrees. Place a small yoga block or firm ball between your knees.
Press your lower back into the wall and gently squeeze the block between your knees to activate your adductors and deep core stabilizers. Hold this position while breathing evenly for thirty to forty-five seconds. Rest for sixty seconds and repeat for three total sets.
Stand on your right leg in an athletic stance. Push off your right foot to bound laterally to your left, landing softly on your left leg.
Absorb the landing by bending your left hip, knee, and ankle, holding the single-leg position completely still for two seconds before bounding back to the right. Maintain control of your knee tracking so that your joint does not collapse inward upon impact. Perform three sets of five bounds in each direction.
To complement these dynamic drills with cardiovascular programming, review our comprehensive performance and fitness articles.
Mobility is the active, usable range of motion you can control under load. It differs fundamentally from passive flexibility, which simply measures how far a joint can be pushed by external forces. On the mountain, having passive flexibility without muscular control leaves your joints vulnerable to twisting injuries.
Ankle dorsiflexion is the most critical mobility limitation for alpine skiers. In modern ski boots, your shins must drive forward into the plastic tongue to initiate clean edge pressure. If your calf complex or ankle joint capsule is stiff, your body will compensate by pitching the torso too far forward or collapsing the arch of the foot. This compensation creates knee valgus, an inward collapse that places significant stress on the medial collateral ligament.
Dedicated ankle mobility work should be performed daily. Position your foot four inches from a wall and drive your knee forward over your middle toes without letting your heel lift from the floor. Hold the end range for two seconds, return, and repeat for fifteen repetitions per leg. Pair this with foam rolling and soft tissue release for the gastrocnemius and soleus muscles.
Hip mobility directly influences lower back comfort and turning efficiency. Skiing requires fluid internal and external hip rotation so your legs can steer independently beneath a stable upper body. When hip rotation is restricted, your body compensates by twisting through the lumbar spine. This movement pattern leads to severe lower back fatigue and compromises edge control on firm snow.
Incorporate the seated or floor ninety-ninety hip stretch into your morning routine. Sit on the floor with both knees bent at ninety-degree angles, one leg in front of you and one leg to the side. Maintain an upright spine while gently rotating your torso toward the front knee for thirty seconds, then transition to the opposite side. This drill restores rotational freedom to the hip capsule.
Thoracic spine mobility allows you to maintain upper-and-lower body separation. In modern carved turns, your lower body rotates and edges into the hill while your upper chest and shoulders remain oriented down the fall line. If your thoracic spine is rigid, your entire upper body will rotate with your skis, throwing your weight onto the inside ski and initiating a skidded, uncontrolled turn.
Perform quadruped thoracic rotations to open the mid-back. Begin on your hands and knees, place one hand behind your head, and rotate your elbow up toward the ceiling while keeping your hips level. Pause at the top for a full breath, then rotate back down. Complete ten controlled repetitions per side.
Ascending rapidly to mountain destinations presents a physiological challenge that operates independently of your physical fitness. Many premier ski destinations feature base villages above 8,000 feet and summits reaching beyond 11,000 feet. At these elevations, barometric pressure drops, reducing the number of oxygen molecules per breath.
The human body adapts to reduced oxygen through hyperventilation, increased heart rate, and an eventual rise in red blood cell mass. However, these physiological adjustments take several days to stabilize. If you demand maximal physical output immediately upon arrival, you dramatically increase the likelihood of acute mountain sickness.
The Centers for Disease Control and Prevention provides clear guidelines for high-altitude travel. The CDC advises against traveling directly from sea level to a sleeping altitude above 9,000 feet (2,750 meters) in a single day. When operating above 9,000 feet, the recommended progression is limiting sleeping elevation gains to no more than 1,600 feet (500 meters) per day, accompanied by an acclimatization rest day every three to four days.
It is important to distinguish between your daytime skiing elevation and your overnight sleeping elevation. Research confirms that altitude illness correlates far more closely with sleeping elevation than with the brief peak heights reached on chairlifts. If you have the logistical flexibility, choosing lodging at a lower valley elevation rather than a high alpine village significantly improves sleep quality and accelerates physical recovery.
The CDC specifically advises travelers to avoid alcohol during their first 48 hours at high altitude. Alcohol acts as a respiratory depressant, compounding the low oxygen levels that occur naturally during sleep in thin air. It also exacerbates dehydration, which is already accelerated by the dry mountain climate and increased breathing rates.
Additionally, public health authorities recommend avoiding vigorous, exhaustive exercise during your first 48 hours above 8,000 feet. Treat your arrival day and your first morning on the slopes as an acclimatization period. Ski moderate runs, take frequent breaks, drink plenty of water with electrolytes, and allow your cardiovascular system to adjust before attempting steep, demanding lines.
Pay close attention to early indicators of altitude illness. Common symptoms include throbbing frontal headaches, nausea, loss of appetite, unusual fatigue, lightheadedness, and interrupted sleep patterns. If mild symptoms appear, do not push through them with aggressive skiing. Rest, hydrate, and maintain your current altitude until symptoms resolve completely.
If symptoms progress to persistent vomiting, shortness of breath while resting, confusion, or an inability to walk in a straight line, these are signs of severe altitude illness requiring immediate medical care and descent to a lower elevation. Consult your physician prior to your trip if you have underlying cardiovascular or pulmonary conditions. Your doctor may discuss preventive options like acetazolamide for high-altitude itineraries.
For specialized advice on managing the physical demands of high-elevation journeys, explore our travel and human performance resources.
Your ski equipment functions as the direct mechanical interface between your muscular efforts and the snow surface. When gear is improperly matched or poorly fitted, it wastes energy and forces your body into awkward, inefficient compensations that increase joint strain.
Ski boots are the most important piece of sporting equipment you will purchase or rent. The boot cuff must hold your ankle and heel firmly in place with zero internal slop, allowing your subtle weight shifts to transfer immediately to the ski edges. If your boots are too large, your foot slides around, forcing your toes to grip the footbed and causing calf cramping and burning foot arches.
Adults over forty often experience changes in foot structure, including collapsed arches, bunions, or reduced ankle mobility. Investing in a consultation with a certified master boot fitter is essential. A professional fitter can match the internal volume of the shell to your foot shape, mold custom supportive footbeds, and modify the forward lean and lateral cuff alignment to match your natural leg anatomy.
Watch for key warning signs that your boots fit incorrectly:
Ski bindings are sophisticated mechanical safety release systems. They are engineered to hold your boot securely during athletic skiing maneuvers while releasing cleanly during high-energy falls to protect your lower limbs from severe twisting injuries.
Always have your bindings inspected, adjusted, and calibrated by a certified technician at the start of every season or rental period. The technician calculates your specific release values using standardized charts based on your height, weight, age, boot sole length, and verified skier type. Never inflate your skiing ability or understate your weight to obtain higher binding settings, as this prevents the binding from releasing during a low-speed twisting fall.
Evidence summaries note higher injury odds among skiers using rental equipment, with an odds ratio of roughly 2.58 in observational datasets. This heightened risk often stems from unfamiliarity with the gear, improper boot fit, and generic binding settings rather than the equipment itself. If you rent gear, take the time to test your boot fit thoroughly in the rental shop and confirm your release settings with the technician before heading to the lift.
Systematic reviews demonstrate that wearing a certified ski helmet significantly reduces the risk of traumatic head injuries on the slopes, with studies reporting risk reductions between fifteen and sixty percent. Modern helmets combine lightweight construction with rotational energy absorption systems that dissipate oblique impact forces.
Ensure your helmet fits snugly across your brow without pinching, remains stable when you shake your head, and integrates seamlessly with your goggles to eliminate forehead gaps. Replace your helmet immediately following any significant impact or after five years of regular use, as protective foam degrades over time.
Quality goggles are an active safety tool rather than a cosmetic accessory. In flat light or during snowfall, the human eye struggles to perceive terrain contours, moguls, and icy patches. Skiing into unseen terrain changes causes sudden, violent balance disruptions that challenge your joints. Carry dual lenses: a dark, polarized lens for high-altitude sunshine, and a high-contrast rose or amber low-light lens for overcast and stormy afternoons.
Fatigue is not just a subjective feeling of tiredness. It is a systematic decline in neuromuscular coordination, reaction speed, and cognitive decision-making. As the skiing day progresses, your eccentric force capacity drops, leaving your joints exposed to higher mechanical loads.
The International Ski Mountaineering and Alpine Federations emphasize systematic warm-ups to prepare the nervous system for on-snow demands. Before boarding the first lift, spend five minutes performing arm swings, torso rotations, bodyweight squats, and lateral lunges in the base area. Take your first two runs on wide, gentle groomers well below your maximum ability level to tune your edge feel and warm your joint tissues.
A significant proportion of ski injuries occur after two o'clock in the afternoon. By this point, leg muscles are depleted of glycogen, physical reaction times slow down, and changing afternoon light obscures snow imperfections. Skier traffic also peaks, creating chopped, heavy snow conditions that demand higher physical effort to navigate.
Learn to recognize the subtle technical markers of neuromuscular fatigue before they lead to a fall:
When you notice these signs, the correct response is to step down terrain difficulty or head to the base lodge. The mindset of taking "just one more run" at the end of the day is a common pitfall. The final run usually occurs when your muscles have lost the capacity to protect your joints from sudden forces.
Use a structured assessment each morning over breakfast to determine your planned skiing volume and terrain selection.
A green morning means you slept soundly, experience minimal joint stiffness, have no altitude headache, and feel mentally sharp. You can proceed with your standard mountain plan, exploring varied terrain and technical lines.
A yellow morning is marked by noticeable muscle soreness, joint stiffness, disrupted sleep, or mild altitude fatigue. You should adjust your plan by choosing groomed blue runs, taking extra rest breaks every three runs, and concluding your ski day by early afternoon.
A red morning presents with persistent joint pain, a throbbing altitude headache, systemic exhaustion, or dizziness. On red mornings, do not ski. Take a dedicated recovery day, visit the thermal baths, perform gentle mobility exercises, and let your body recharge. For proven post-activity routines, review our recovery and sleep strategies.
Many popular assumptions regarding ski conditioning and safety for mature adults are incomplete or physiologically inaccurate. Clearing up these misconceptions helps you train more effectively and avoid common mistakes on the mountain.
A common myth is that turning forty automatically makes skiing high-risk. While connective tissues undergo natural cellular changes with age, your functional capacity is primarily determined by consistent training, joint mobility, and balanced movement. A well-conditioned fifty-year-old with solid eccentric strength and mobility will handle the physical demands of skiing far better than an untrained thirty-year-old.
Many skiers rely heavily on seated leg extensions and stationary cycling machines to get ready for the season. While these exercises build general quadriceps tolerance, they fail to train the hamstrings, gluteus medius, and foot stabilizers that protect the knee joint. Alpine skiing is a multi-planar sport requiring strong lateral hip stability and posterior chain support to keep the knee tracking safely during high-speed turns.
Risk-factor analyses reveal that experienced skiers and self-described experts actually sustain higher rates of bone fractures than novices. Experienced skiers often move at much higher speeds and tackle steeper, higher-consequence terrain. When an expert experiences a fall due to fatigue or variable snow, the kinetic energy involved is substantially greater. Technical expertise must always be supported by physical conditioning and smart pacing.
Spending twenty minutes holding static hamstring and groin stretches before clicking into your skis does not protect you from injury. In fact, prolonged static stretching immediately before athletic activity can temporarily decrease muscle stiffness and reduce your explosive force production. Pre-ski preparation should focus on dynamic mobility, core activation, and progressive warm-up runs on snow.
If your professional and personal schedule leaves little time for long workouts, you can still build excellent ski readiness using a compact, high-density protocol. This routine targets the primary physiological demands of alpine skiing in just twenty minutes per day, four days per week.
Execute this express routine as a continuous circuit, moving smoothly between exercises with sixty seconds of rest after each full round:
This efficient circuit reinforces single-leg deceleration, isometric leg endurance, and sensorimotor balance without requiring specialized gym machinery.
Medical organizations and alpine governing bodies share a clear consensus on preparing for winter sports. Research published by the International Ski Federation (FIS) recommends that pre-season conditioning address cardiovascular capacity, neuromuscular coordination, and eccentric muscular control.
Sports medicine centers, such as the University of Colorado Sports Medicine program, consistently recommend starting physical conditioning eight to twelve weeks prior to your first day on snow. Clinical guidelines emphasize that conditioning must be paired with sensible mountain management, including proper equipment calibration, full hydration, and structured rest periods.
Global travel health organizations, including the CDC and Health Canada, emphasize that acclimatization to altitude cannot be rushed by physical fitness alone. Proper acclimatization requires managing sleeping elevations, staying hydrated, avoiding alcohol during initial exposure, and recognizing early symptoms of altitude illness. Applying these evidence-based principles allows you to enjoy every descent with strength, confidence, and complete control.
To review more foundational principles of healthy movement, visit our healthy aging and living well knowledge base.
Use this practical checklist to launch your ski preparation plan starting this week:
Stay connected for research and practical guidance on longevity, strength, recovery, energy and active living. New ideas to help you stay capable, curious and ready for more.


Explore practical guidance on strength, recovery, energy, travel and longevity for a life that stays active.
explore the Blog