
Joint-friendly strength training relies on monitoring symptom thresholds, adjusting movement speed, and applying smart exercise substitutions to build.





You wake up in a mountain lodge with crisp morning air outside and a full day of backcountry trails ahead. As you swing your legs out of bed, your knees feel stiff, cold, and noticeably irritated. An older sports injury or years of high mileage make you hesitate. You wonder if loading those joints with resistance in the gym will cause further wear.
That hesitation is common among active adults over forty. Many people assume joint discomfort requires complete rest, while others attempt to push through sharp pain. Neither approach supports long-term physical freedom.
Strength training remains one of the most effective ways to support articular cartilage, preserve bone density, and maintain joint function. Managing joint sensitivity is not about eliminating exercise. It is about learning how to modify movement variables to match current tissue capacity.
By making precise adjustments to range of motion, movement tempo, and load, you can build muscular strength without irritating your joints. This guide outlines practical strategies for training around sensitivity while continuing to pursue demanding outdoor adventures.
Joint sensitivity is a descriptive state rather than a single medical diagnosis. It encompasses sensations linked to osteoarthritis, previous ligament injuries, tendon irritation, or transient inflammatory reactions. When a joint feels sensitive, people often assume they are actively grinding down cartilage or damaging structural tissue.
Biomechanics and pain science show that discomfort does not automatically signal structural harm. Exercise can create temporary symptoms without worsening underlying joint architecture. Research from clinical rehabilitation demonstrates that controlled mechanical loading promotes synovial fluid circulation, which nourishes joint cartilage.
Major clinical guidelines from the National Institute for Health and Care Excellence recommend therapeutic exercise, particularly local muscle strengthening and aerobic conditioning, as a foundational treatment for joint conditions. Systematic reviews consistently show that resistance training reduces pain, decreases stiffness, and improves physical function in individuals with osteoarthritis.
Note: This conceptual model highlights that you can reduce mechanical joint stress by adjusting variables other than just dropping the weight.
Load tolerance is the amount of mechanical stress a joint and its surrounding musculature can repeatedly absorb without creating an excessive inflammatory response. Training capacity fluctuates based on sleep, recent travel, previous training volume, and recovery. When the physical exposure of your workout matches your capacity, your joints adapt positively.
When exposure suddenly exceeds capacity through excessive volume, erratic speed, or forced depth, symptoms appear. The goal of smart programming is to keep physical exposure within a productive window that stimulates muscle without overwhelming joint capacity. Explore our healthy aging and living well resources to understand how tissue resilience changes over time.
Training through joint sensitivity requires a clear understanding of bodily signals. Some discomfort is a natural part of tissue adaptation, while other symptoms require immediate modification or medical attention.
A simple traffic-light model provides an objective decision framework during your workouts.
A green response means your current exercise dose is well within your joint tolerance:
When these criteria are met, you can proceed with your planned workout without adjusting your exercises.
A yellow response indicates the mechanical demand is challenging your current capacity:
A yellow response does not require abandoning the session. Instead, you should adjust the movement by reducing external weight, shortening the range of motion, slowing the tempo, or changing the exercise variation.
A red response signals potential tissue overload or an acute issue:
If you encounter a red response, stop loading the affected joint immediately. Acutely hot, swollen joints accompanied by systemic symptoms, sudden instability, or trauma require evaluation by a qualified medical professional.
Post-workout recovery windows offer reliable feedback on your training volume. Clinical arthritis guidelines suggest that if joint discomfort remains elevated for more than two hours after exercise, the mechanical stress exceeded your current tolerance.
The 24-hour rule provides a conservative benchmark for resistance training. Your joints should return to their baseline level of comfort by the following morning. If morning stiffness or pain is worse than usual, reduce your training volume or intensity in the next session.
Tracking these responses over several weeks helps you identify specific exercises or load thresholds that cause irritation. Consistent tracking prevents minor joint sensitivities from turning into chronic setbacks.
One of the most persistent myths in fitness is that every repetition must move through a maximal anatomical range to produce results. While full-range training is effective for muscle hypertrophy in healthy populations, forcing a sensitive joint through a painful end-range position often leads to irritation.
Using your maximum comfortable range of motion protects your joints while still providing a robust training stimulus. Shortening the range of motion allows you to target muscles effectively while bypassing positions of joint impingement or excessive shear stress.
Partial range movements allow you to maintain muscular tension without aggravating sensitive structures. Here are several practical examples:
Partial range movements are not a compromise. They are a practical training tool that allows you to continue loading muscles while joints adapt.
Range of motion can serve as a progression tool just like adding weight to the bar. When your joints are sensitive, you can keep the external load constant while gradually expanding your movement depth over several weeks.
For example, you might start performing box squats to a sixteen-inch box. As your hip and knee tolerance improves, you can lower the box to fourteen inches while maintaining the same weight. This approach trains joint mobility and strength simultaneously without causing sudden spikes in tissue stress.
Research indicates that progressive resistance training with external loads can improve joint range of motion over time. By focusing on controlled, pain-free ranges, you build joint capacity safely and sustainably.
Movement velocity influences the mechanical forces experienced by your joints. Fast, explosive repetitions create high peak forces and rapid changes in direction, which can irritate sensitive articular surfaces.
Slowing your movement tempo reduces momentum and improves motor control. It ensures that your muscles, rather than passive joint structures, absorb the mechanical load throughout the movement.
The eccentric phase occurs when a muscle lengthens under tension, such as lowering yourself into a squat or lowering a dumbbell during a curl. Controlling this phase over three to four seconds provides substantial benefits for sensitive joints:
Controlling the eccentric phase allows you to generate high levels of muscular tension using lighter external weights, which reduces overall joint stress.
Pausing for one to two seconds at the transition point of an exercise removes elastic recoil. This forces your muscles to initiate the return movement without relying on momentum.
In a split squat, pausing just above the bottom position builds strength and stability where your joint is most vulnerable. Pauses also provide a mental checkpoint to ensure your posture, alignment, and joint tracking remain sound before continuing the repetition.
Isometric exercises involve generating muscular force without moving the joint through an arc of motion. Research in joint rehabilitation shows that isometric contractions can reduce pain while maintaining muscular strength.
If dynamic knee extensions irritate your patellar tendon or cartilage, a seated isometric leg extension held at a comfortable angle can provide a strong training stimulus without joint friction. Isometrics serve as a dependable bridge back to dynamic training during periods of heightened sensitivity.
Slowing your tempo increases total time under tension. If a slow repetition causes prolonged joint compression, return to a moderate, smooth speed. The best tempo is the slowest cadence that provides control without causing unnecessary joint fatigue.
You do not need to abandon fundamental movement patterns when a joint becomes sensitive. You simply need to change the exercise constraints to match your current tolerance.
By selecting variations that offer better leverage, external support, or self-selected joint paths, you can train your entire body effectively. Explore our strength and physical performance guides for structured exercise progressions.
Deep bilateral squats require significant ankle dorsiflexion, knee flexion, and hip mobility. When any of these joints are sensitive, standard barbell back squats can feel uncomfortable.
Deadlifts from the floor require substantial hip flexion and place significant demands on the posterior chain and lower back.
Fixed barbell pressing forces the wrists, elbows, and shoulders into rigid movement tracks that can irritate sensitive joints.
Unsupported bent-over rows require your lower back and hips to maintain a static hinge, which can be exhausting if those joints are sensitive.
The tools you select have a direct impact on joint comfort and movement execution. Understanding the mechanical advantages of different equipment options allows you to make informed choices during your workouts.
Strength training machines provide fixed paths of motion and built-in external stability.
Free weights allow you to move naturally along self-selected paths.
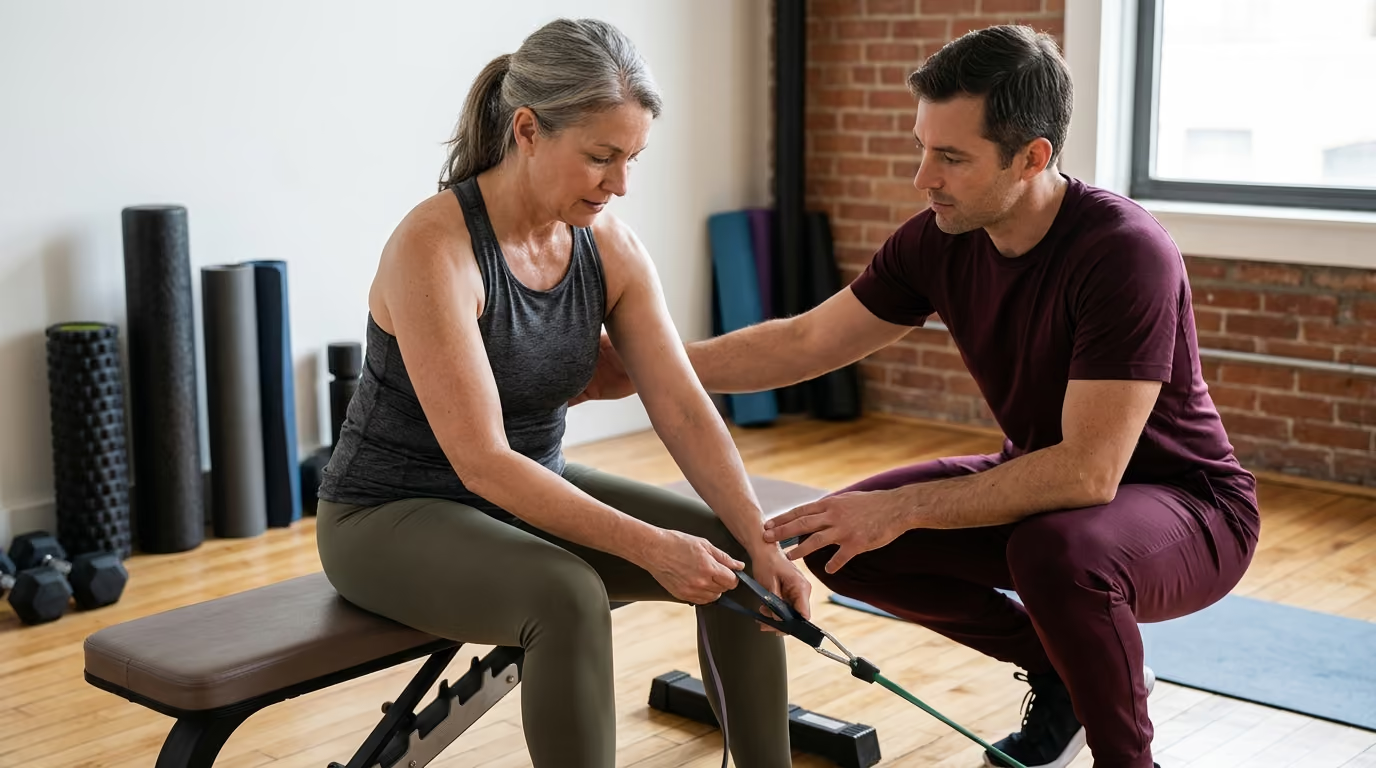
Cable systems and elastic bands provide smooth, continuous resistance across various movement angles.
Using support equipment is not a shortcut. It is a practical way to manage stability demands and protect sensitive joints.
Joint sensitivity is rarely linear. Atmospheric changes, travel fatigue, poor sleep, or unexpected daily physical demands can trigger temporary symptom flares.
A flare does not require complete bed rest. In fact, prolonged inactivity often leads to joint stiffness, muscle weakness, and decreased tissue capacity. Managing a flare involves reducing training volume while keeping your body moving comfortably. For deeper insights into managing systemic recovery, consult our recovery and sleep strategies.
Identify the specific movement, load, or volume threshold that triggered the flare. If deep lunges irritated your knee, remove lunges from your program for seven to fourteen days rather than stopping lower-body training altogether.
Gentle movement promotes blood flow and circulates synovial fluid to nourish articular cartilage. Engage in low-impact activities such as easy stationary cycling, flat walking, or water-based exercises. Keep these sessions comfortable, aiming to promote recovery rather than build endurance.
A flare in one joint provides an opportunity to focus on other parts of your body. If your shoulder is sensitive, shift your focus to lower-body strength, trunk stability, and hip development. If a knee is irritated, emphasize upper-body pushing and pulling while using supportive machines for posterior-chain work.
When symptoms settle back to baseline, reintroduce the sensitive movement pattern using lighter weights and shorter ranges of motion. Use isometric holds or high-stability machine variations before progressing back to free-weight dynamic exercises.
Once a joint tolerates light loading, increase your training volume gradually. Avoid the temptation to jump straight back to pre-flare weights. Progress your repetitions and movement control before adding external resistance.
Joint resilience is essential for maintaining an active lifestyle. Whether carrying luggage across international terminals, skiing alpine slopes, or trekking remote trails, real-world capability depends on well-conditioned joints and supportive musculature.
Last winter in Chamonix, I noticed something striking. It was not the altitude that forced my peers into the lodge by noon, it was a lack of rotational strength and poor recovery from the flight. We spend so much time debating the perfect supplement stack, yet we neglect the basic foundational strength required to actually enjoy our travels.
That trip changed how I approach fitness. I stopped training for aesthetics and started training exclusively for capability. You can explore more about our physical philosophy on our about WealthAtPlay page.
Hiking downhill or skiing variable terrain places high eccentric demands on the quadriceps and patellofemoral joints. If your knees are sensitive, prepare them using slow, controlled step-downs from a low four-inch block. This builds eccentric strength in the quadriceps without subjecting the joint to heavy impact forces.
Navigating uneven ground while carrying a backpack requires rotational trunk strength and hip stability. Incorporating anti-rotation movements, such as Pallof presses and cable woodchops with a comfortable stance, helps stabilize your pelvis and spine. This protects your hips and lower back during sudden shifts in balance.
Hoisting luggage into overhead bins or carrying heavy bags through train stations places sudden demands on shoulders, wrists, and the lower back. Building capacity through neutral-grip overhead dumbbell presses and farmer carries prepares your joints for travel demands without causing unnecessary irritation. Read more in our travel and adventure articles to help you prepare for demanding journeys.
You do not need to spend hours in the gym to build joint resilience. Research shows that two to three focused resistance sessions per week produce substantial improvements in joint health, muscular strength, and functional capacity.
Focusing on a few core exercises per session delivers strong results while keeping joint fatigue manageable.
Allow at least forty-eight hours between strength sessions targeting the same muscle groups. This recovery window gives your connective tissues and articular structures adequate time to adapt to training stress.
Performing moderate repetition ranges between eight and fifteen repetitions per set is generally well tolerated by sensitive joints. This range produces meaningful muscular fatigue and stimulus without requiring the heavy joint loads associated with low-repetition maximums.
Aim for two to three working sets per exercise. A systematic review on resistance training dosage found that consistent programs lasting eight to twelve weeks produced substantial improvements in joint function and comfort. Focus on quality repetitions and steady adherence rather than high training volume.
Train with an effort level of roughly seven on a ten-point scale of perceived exertion. You should finish each set feeling as though you could have completed two to three more clean repetitions with good form.
When progressing, increase external resistance by no more than five to ten percent at a time, and make only one adjustment per week. Ensure your joints tolerate a new load comfortably for two full workouts before increasing the weight again.
Navigating joint sensitivity requires balancing physical stress and recovery. Here are eight common mistakes to avoid:
Resting completely during joint irritation causes surrounding muscles to weaken, which increases joint stress when you return to daily activities. Maintain tolerable movement to support tissue health and function.
Training through sharp, stabbing, or progressively worsening joint pain can turn minor sensitivities into chronic injuries. Always treat pain as valuable feedback to adjust your range, load, or exercise variation.
Insisting on touching your chest to the bar during presses or squatting past parallel can aggravate sensitive joints. Use the largest range of motion you can control comfortably without pain.
While partial ranges are a helpful modification, remaining in them indefinitely limits long-term mobility and strength gains. Gradually expand your movement depth as joint tolerance improves.
Research shows that performing more exercises does not lead to better functional outcomes or pain relief. Stick to three to five well-chosen movements per session and execute them with good control.
Extended bed rest leads to joint stiffness and rapid muscle loss. Stay active during flares with gentle walking, light mobility drills, or pool exercises.
Machines offer helpful stability, but their fixed movement paths may not fit your specific body proportions. Evaluate every piece of equipment by how comfortable and natural it feels during the movement.
Adding weight too fast can overwhelm connective tissues before they have time to adapt. Focus on improving movement control, tempo, and range of motion before increasing external resistance.
Return to this guide whenever you experience joint sensitivity, whether preparing for an alpine ski season, recovering from long-haul travel, or managing a minor training setback. Reviewing these principles helps you adjust movement angles, manage tempos, and choose appropriate exercises to keep training productively.
Smart training is not about avoiding physical challenge. It is about using intelligent modifications that keep you strong, mobile, and ready for your next outdoor adventure.
Stay connected for research and practical guidance on longevity, strength, recovery, energy and active living. New ideas to help you stay capable, curious and ready for more.


Explore practical guidance on strength, recovery, energy, travel and longevity for a life that stays active.
explore the Blog